Friday, March 21, 2014

Chocolate Fudge Peanut Butter Cookie Stuffed Cookies

Chocolate Fudge Peanut Butter Cookie Stuffed Cookies


Ingredients

1 cup creamy peanut butter
1/2 cup granulated sugar
1 egg
2 sticks softened butter
1 cup granulated sugar
3/4 cup light brown sugar (packed)
2 large eggs
1 tbsp pure vanilla extract
13/4 cups all purpose flour
1 tsp baking soda
1/2 tsp kosher salt
11/2 cups chocolate chips (I used semi-sweet)
1 cup cocoa powder


Preparation

1. Preheat oven to 350 degrees F. and line a large baking sheet with parchment paper or a silpat liner.

2. Place peanut butter and sugar into a medium bowl, mix to combine then add egg, mixing until well combined. Set aside.


3. In a stand or electric mixer, beat butter and sugars until well combined. Add eggs and vanilla, beating until well combined.

4. Place flour, baking soda, and salt into a large bowl. Add to wet ingredients along with cocoa powder, and chocolate chips, slowly mixing until just combined. With a small cookie scoop, scoop peanut butter cookie dough into your hand. With a medium cookie scoop, scoop chocolate dough on top and on bottom of peanut butter dough. With hands, press chocolate dough around peanut butter dough, forming into a cookie shape. Place onto prepared baking sheet, about 1 inch apart from each other. Bake for 14 to 16 minutes, until cooked through. Let cool on baking sheet for 5 minutes before transferring to a cooling rack. Serve with milk.


Makes 3 dozen cookies

Thursday, March 20, 2014

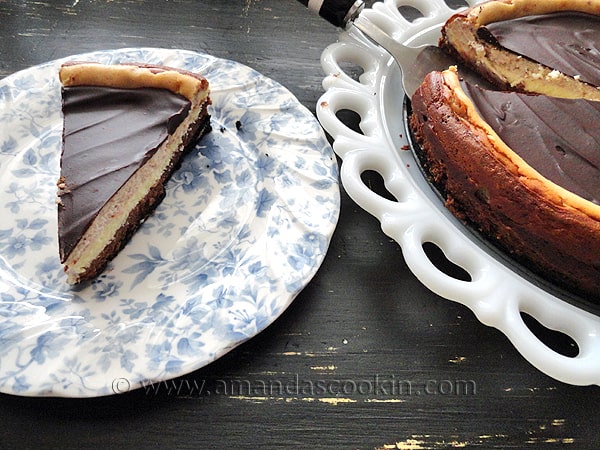
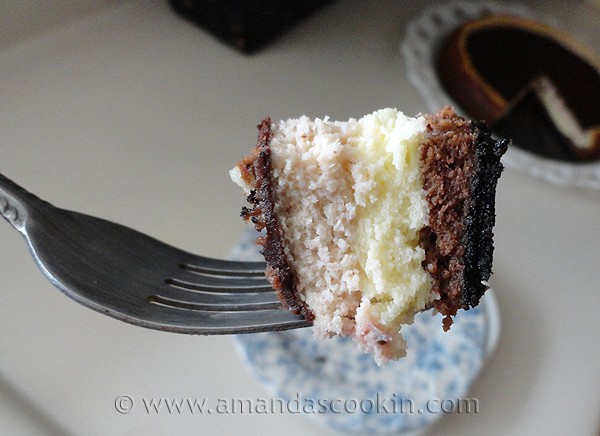
❈ Neapolitan Cheesecake ❈

Neapolitan Cheesecake

Ingredients

Crust
❈   1 1/4 cups chocolate sandwich cookie crumbs (about 13 sandwich cookies)
❈   1/4 cup unsalted butter, melted
Filling
❈   3 8-oz packages cream cheese
❈   3/4 cup sugar
❈   3 eggs
❈   2 teaspoons vanilla extract
❈   2 oz semisweet chocolate, melted and cooled
❈   2 oz white chocolate, melted and cooled
❈   1/2 cup fresh strawberries, mashed fine
Ganache Topping
❈   2 oz semisweet chocolate, chopped
❈   1/4 cup heavy cream
❈   1/2 tablespoon unsalted butter, cut into small pieces

Neapolitan Cheesecake

Instructions

❈   Preheat oven to 350 F and grease a 9-inch springform pan.
❈   In a bowl with a fork, combine cookie crumbs and butter. Press crumb mixture into the bottom of springform pan and freeze.
❈   In mixer with paddle attachment, beat cream cheese and sugar on medium-high speed until very smooth, about 3 minutes. Add eggs, one at a time, beating after each addition. Mix in vanilla.
❈   Divide the batter into 3 equal portions. Mix the semisweet chocolate into one third, the white chocolate into another third, and the strawberries into the remaining third.
❈   Spread the chocolate batter over the frozen crust, smoothing out to sides of pan. Refrigerate five minutes. Next carefully add the white chocolate layer, covering the chocolate layer completely. Refrigerate five minutes. Finally, add the strawberry layer, spreading evenly over the white chocolate layer.
❈   Place springform pan on a cookie sheet. Bake in preheated oven until top is light brown and center jiggles slightly, 45-55 minutes. Turn off oven and prop open oven door. Leave cheesecake in oven so that it cools gradually. Remove from oven when oven has cooled and place on a cooling rack. Chill in the refrigerator for 6 hours, overnight is best.
❈   Before serving, prepare the ganache by microwaving the chocolate for one minute or so, until mostly melted. In a separate dish, microwave the heavy cream for 20 seconds, until very warm. Add hot cream to the chocolate and stir, add butter pieces and stir until melted. Spread ganache on top of chilled cheesecake and allow to set before cutting.

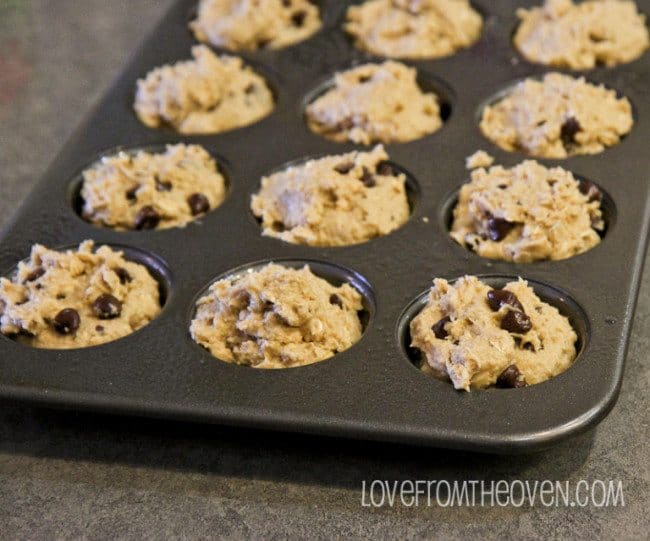
❂ Peanut Butter Oatmeal Chocolate Chip Cookie Muffins ❂

12 Extra Large Standard Muffins or 18 Regular Standard Muffins
Peanut Butter Oatmeal Chocolate Chip Cookie Muffins

Ingredients

❂   1 1/2 Cups White Whole Wheat Flour (all purpose would work as well)
❂   1 cup oats
❂   1/2 cup brown sugar
❂   1 tsp baking powder
❂   1/2 tsp baking soda
❂   1/2 tsp salt (optional)
❂   1 cup vanilla Greek yogurt
❂   2 medium size ripe bananas
❂   1/4 cup melted butter
❂   1/4 cup milk
❂   3/4 cup peanut butter or No-Nut Butter
❂   1 tablespoon vanilla extract
❂   1 large egg
❂   1/2 cup cup chocolate chips (you can use more or less if you like, or even try peanut butter chips!)


Instructions
❂   Preheat oven to 167 ℃

❂   In a large bowl, combine flour, oats, baking powder, baking soda, salt and brown sugar and set aside.

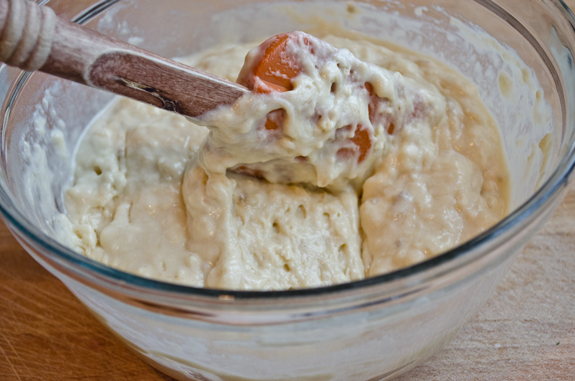
❂   In a food processor (or blender or mixer) combine yogurt, bananas, melted butter, peanut butter, milk, egg and vanilla until very well blended. Mixture will be fairly thick.

❂   Combine wet and dry ingredients, as well as chocolate chips, and stir until well combined but do not over mix.

❂   Scoop into a greased muffin tin.

❂   Bake for approx 18-22 minutes or until toothpick inserted in center comes out clean and/or top of muffin springs back when lightly touched. Enjoy! These freeze well and make for a great breakfast or quick snack.

❈ Peanut Butter Banana White Chocolate Chip Muffins ❈

18 Standard Size Muffins
Peanut Butter Banana White Chocolate Chip Muffins

Ingredients

❈    1 1/2 Cups White Whole Wheat Flour (all purpose would work as well)
❈    1 cup Oats
❈    3/4 cup sugar
❈    1 tsp baking powder
❈    1/2 tsp baking soda
❈    1/2 tsp salt
❈    3 large ripe bananas
❈    1 cup vanilla Greek yogurt
❈    1/4 cup milk
❈    1/2 cup peanut butter (or No-Nut Butter if you have nut allergies)
❈    1/2 cup melted butter
❈    2 tablespoons vanilla extract
❈    1 large egg
❈    1/2-1 cup white chocolate chips

Instructions

❈    Preheat oven to 167 ℃
❈    In a large bowl, combine flour, oats, baking powder, baking soda, salt and sugar and set aside.
❈    In a food processor (or blender or mixer) combine yogurt, bananas, melted butter, peanut butter, milk, egg and vanilla until very well blended. Mixture will be fairly thick.
❈    Combine wet and dry ingredients, as well as white chocolate chips, and stir until well combined but do not over mix.
❈    Scoop into a greased muffin tin.
❈    Bake for approx 16-22 minutes or until toothpick inserted in center comes out clean and/or top of muffin springs back when lightly touched. Enjoy! These freeze well and make for a great breakfast or quick snack.

✿ Chocolate Muffins Recipe ✿

12 standard size muffins

Chocolate Muffins Recipe

Ingredients

✿ 1/4 cup butter, softened
✿ 1/2 cup vanilla Greek yogurt
✿ 3/4 cup sugar
✿ 2 eggs
✿ 1 1/2 tsp vanilla
✿ 3 large ripe bananas
✿ 1 1/3 cup white whole wheat flour
✿ 2/3 cup dark cocoa powder
✿ 1 tsp baking soda
✿ 1 tsp baking powder
✿ 1 tsp salt
✿ 1/4 cup milk
✿ 1 cup chocolate chips, nuts or other mix ins (optional)

Instructions

✿   Preheat oven to 167 ℃

✿  Puree, mix or blend bananas until smooth. 
✿  Add in butter and yogurt and mix until well combined. 
✿  Add in eggs and vanilla, mixing until well combined. 
✿  Stir in sugar until well combined. In a separate bowl, mix white whole wheat flour, dark cocoa powder, baking soda and salt
✿  Combine wet and dry ingredients, add in milk and stir until well combined. 
✿  Scoop into a muffin pan that has been lightly sprayed with cooking spray. 
✿  Bake for 15-20 minutes or until tops spring back when touched. 
✿  Remove from oven and allow to cool. 
✿  Store loosely covered or in refrigerator.

ChOc CoOkiEs


Ingredients

1 cup (2 sticks) cold, unsalted butter, cubed
1¼ cup sugar
2 large eggs
½ cup dark cocoa powder (regular cocoa powder can be used)
2¼ cups all-purpose flour
¼ tsp. coarse salt (regular salt can be used)
1 tsp. baking powder
1 1/2 cups chocolate chips - I used Nestle Tollhouse Holiday Morsels


Instructions

Preheat the oven to 167 'C.

In the bowl of an electric mixer, combine the butter and sugar. Beat together on medium-high speed until light and fluffy, 2-3 minutes. Blend in the eggs one at a time, scraping down the bowl as needed. Mix in the cocoa powder until well blended.

Add the flour, salt and baking powder to the bowl and mix on low speed just until incorporated. Fold in the chocolate chips with a spatula.

The dough is very thick! Transfer the dough to a work surface and knead briefly by hand to be sure the ingredients are well combined. I kneaded mine in the bowl, and that worked out just fine.

Using a standard size cookie scoop, scoop cookie dough onto cookie sheets. To make 36 cookies, 12 cookies should fit onto each sheet.

Bake for approx 10 minutes. Let cool for 5-10 minutes on cookie sheets, then transfer to a wire rack to cool completely. Enjoy!

Monday, March 17, 2014

❄ Best Breakfast Pancakes ❄

Servings: 6-8 large pancakes
Total Time: 15 Minutes


pancakes

Ingredients

1 cup all-purpose flour, spooned into measuring cup and leveled-off with back edge of knife
2 teaspoons baking powder
2 tablespoons sugar
1/2 teaspoon salt
1 large egg
3/4 cup plus 2 tablespoons milk
2 tablespoons unsalted butter, melted and slightly cooled
Vegetable oil, for cooking

Instructions

⌘ Combine the flour, baking powder, sugar and salt in a bowl and mix well.

⌘ Beat the egg and milk together in a bowl. In a different bowl, add the milk mixture to the melted butter, stirring constantly with a whisk to blend.

⌘ Pour the milk mixture into the dry ingredients and stir just enough to moisten the flour mixture. It should look a little lumpy. (If you overwork the mixture, the pancakes will be tough.) This is a thick batter but if it seems too thick, add a bit more milk.

⌘ Heat a griddle or nonstick pan over medium-low heat and coat it with vegetable oil. Drop the batter from a large spoon (about 1/4 cup) and cook until the first side is golden brown, or until the top surface bubbles and is dotted with holes. Flip and cook until the other side is golden brown. This happens quickly so peek after 30 seconds and watch carefully! Adjust the heat setting if necessary. Wipe the griddle totally clean with a paper towel between batches. Serve immediately.


✿ Banana Pancakes Print Recipe ✿

Servings: Makes 12 4-inch pancakes
Total Time: 20 Minutes


Ingredients
For Pancakes
☑ 1-1/2 cups all purpose flour, spooned into measuring cup and leveled off
☑ 2 tablespoons sugar
☑ 2-1/2 teaspoons baking powder
☑ 1/2 teaspoon salt
☑ 1 small, over-ripe banana, peeled (the browner, the better)
☑ 1 cup plus 2 tablespoons low fat milk
☑ 2 large eggs
☑ 1/2 teaspoon vanilla extract
☑ 3 tablespoons unsalted butter, melted
For Cooking
☑ Vegetable oil
☑ Unsalted butter
For Serving
☑ Maple syrup
☑ Sliced bananas
☑ Confectioners' sugar (optional)


Instructions

✎ In a medium bowl, whisk together the flour, sugar, baking powder and salt.

✎ In a small bowl, mash the banana with a fork until almost smooth. Whisk in the eggs, then add the milk and vanilla and whisk until well blended. Pour the banana mixture and the melted butter into the flour mixture. Fold the batter gently with a rubber spatula until just blended; do not over-mix. The batter will be thick and lumpy.

✎ Set a griddle or non-stick pan over medium heat until hot. Put a pad of butter and one tablespoon vegetable oil onto the griddle, and swirl it around. Drop the batter by 1/4-cupfuls onto the griddle, spacing the pancakes about 2 inches apart. Cook until a few holes form on top of each pancake and the underside is golden brown, about 2 minutes. Flip the pancakes and cook until the bottom is golden brown and the top is puffed, 1 to 2 minutes more. Using the spatula, transfer the pancakes to a serving plate.

✎ Wipe the griddle clean with paper towels, add more butter and oil, and repeat with the remaining batter. Serve the pancakes while still hot with maple syrup, sliced bananas and confectioners' sugar if desired.

ღ Banana Honey-Walnut Muffins ღ

Servings: 12 muffins


Ingredients

3/4 cup chopped walnuts
1/3 cup + 1 tablespoon honey, divided
1/2 teaspoon cinnamon
1-1/2 cups all-purpose flour, spooned into measuring cup and leveled-off
1-1/2 teaspoons baking powder
1/2 teaspoon salt
1 stick unsalted butter, at room temperature
2/3 cup sugar
2 large eggs
1/2 cup mashed banana, from 1 large overripe banana
1 teaspoon vanilla extract
1/3 cup whole or low fat milk


Instructions

Preheat the oven to 176°C. Spray a 12-cup muffin tin with non-stick cooking spray, then line with paper liners (it is necessary to do both so that the muffin tops don't stick to pan).
In a small bowl, toss the nuts with 1 tablespoon of the honey and cinnamon until the nuts are evenly coated (obviously, it will be very sticky). Set aside.
In a medium bowl, whisk together the flour, baking powder and salt. Set aside.
In a large bowl, using an electric mixer, beat the butter with the sugar and the remaining 1/3 cup of honey until fluffy, 2-3 minutes. Scrape down the sides of the bowl with a rubber spatula if necessary. At medium speed, add the eggs one at a time and beat until fully incorporated between additions. Beat in the banana and vanilla until blended. (It will look grainy.) At low speed, beat in the dry ingredients in 2 batches, alternating with the milk.
Spoon the batter into the prepared muffin tin (I like to use an ice cream scooper) and sprinkle with the nut topping. Bake the muffins until the tops are golden and a toothpick inserted in the center comes out clean, about 30 minutes. Let the muffins cool in the pan for 10 minutes, then turn them out onto a rack and let cool for at least 15 minutes before serving.

Monday, March 10, 2014

☹ myokymia ☹

Lately, kelopak mata kiri ni asyik berdenyut2 jer. Kalau org2 dulu cakap, klau kelopak mata kiri berdenyut, petanta nk nangis or dpt musibah. Walaupon almost setiap kali mata kiri aku berdenyut, aku akan menangis or mndapat musibah, sebagai umat Islam, xpatut kita percaya bende2 karut ni. Antaranya ada yang berpendapat seperti berikut: “kalau yang bergerak tuh kelopak mata kanan, ada sedara belah ayah yang meninggal , kalau belah kiri , ada sedara belah mak pulak yang meninggal” dan “kalau mata kanan yang bergerak, nak tengok orang atau nak jumpa orang jauh”. Ada juga yang kata “nak dapat berita baik”. Kalau kelopak mata kiri yang bergerak, katanya “ada berita kurang baik yang akan didengar dan akan menangis”.

Walaubagaimanapun, sebagai muslim kita minta jauh daripada mempercayai kepercayaan-kepercayaan seperti itu. Semua yang berlaku dalam kehidupan kita merupakan ketentuan dari Allah. Semoga yang terbaik juga yang kita akan perolehi. Kita hanya mampu berdoa semoga semua yang baik-baik sahaja yang kita akan dengar dan perolehi. Baik buruk sesuatu kejadian adalah ketentuan dariNya. Pasti ada hikmah di sebalik. Justeru, apa yang berlaku dalam hidup kita sesungguhnya tidak mempunyai kaitan dengan masalah mata bergerak-gerak. Kadang-kadang apa yang berlaku itu adalah secara kebetulan sahaja.

So aku pon buat online search, beberapa maklumat penting berdasarkan pemahaman saintifik. Maklumat yang menarik ialah nama saintifik untuk penyakit mata bergerak ini ialah "myokymia". Berdasarkan kata-kata pakar masalah ini adalah akibat pergerakan otot di bahagian kelopak mata atas dan kadang-kadang di bahagian kelopak mata bawah bawah . Mata bergerak-gerak ini berkait rapat dengan stress, fatigue, kurang tidur dan overdose minum kopi (maybe kes aku, caffien overdose, xpon stress). Anxiety/depression juga boleh mengakibatkan kepada masalah mata bergerak-gerak ini. Kerisauan yang terlalu tinggi dalam diri kita juga turut menyumbang kepada masalah ini. Faktor personaliti juga turut menyumbang kepada masalah ini.

Penawar kepada masalah ini ialah perbanyakkan berehat dan berzikir pada Allah. Perbanyakkan juga membaca Al Quran dan terjemahannya agar hati kita sentiasa tenang apabila membaca ayat-ayat Allah. Moga hati kita sentiasa diberi ketenangan olehNya. Kalau simptom-simptomnya masih berterusan anda dicadangkan agar buat pemeriksaan mata kalau masih mengalami masalah yang sama ( kelopak mata bergerak-gerak).

Kesimpulannya, masalah mata bergerak-gerak ini tidak ada kaitan dengan kepercayaan orang tua-tua. Mungkin kalau sesuatu kejadian yang berlaku semasa kita mengalami masalah ini, ia hanyalah kebetulan sahaja. Sebagai umat Islam, sama-samalah kita elak daripada mempercayai kepercayaan ini kerana ia menghampiri kepada perkara-perkara khurafat. Yakinlah setiap kejadian itu adalah qada’ dan qadar Allah SWT. Wallahu ’alam.

p/s: jangan terlalu percaya sangat.. mungkin hanya kebetulan yang tersangat2..ditambah plak dgn hasutan syaitan suh pecaya bnde2 karut neh..haish!!!!!

http://en.wikipedia.org/wiki/Myokymia

Monday, March 3, 2014

✎ Multiple vendor bank accounts and automatic payment programs (F1100) ✎

A vendor may have multiple bank accounts and may want you to make payments to its accounts on the basis of certain rules. The rule-based selection of the vendor’s bank account may depend on a simple rule based on company code currency and bank account currency — for example, if a vendor supplies materials to multiple company codes. Alternatively, it may be a complex rule related to the nature and currency of payment (e.g., cross-border transfer, domestic funds transfer, and the ability of the vendor’s bank account to receive such payment).


If you could store the vendor’s bank details in the vendor invoice, then you could also use it while making automated payments. However, you can’t key vendor bank information directly into an invoice that you create in your SAP system. This would lead to sub-optimal use of master data (vendor’s bank account information) in transactional data (vendor invoice) from the database viewpoint, because you would have to store the bank account information in each invoice. Your SAP system has an optimal way of addressing the issue by providing a bank identifier — partner bank type — that you can associate to the bank details in the vendor master and then use in the vendor invoice. With this method, the bank identifier provides a relationship between bank details in the vendor master and vendor invoice, allowing for the use of bank details with the vendor invoice during automated payments.


I’ll look at how to assign multiple bank accounts in the vendor master and how to include bank identifier information in manual vendor invoices both with and without reference to a purchase order (PO). (You can create an invoice without reference to a PO if you are buying a very low value item on an ad hoc basis. When you create a PO for a purchase, you have to create an invoice with reference to a PO.)


I’ll also show you how to update this information after go-live if you didn’t use multiple bank accounts before go-live with the mass maintenance process. I’ll explain what to do in the case of vendor invoicing through Electronic Data Interchange (EDI). I’ll cover two methods of manual invoice creation and one method of automatic invoice creation from an EDI message. I developed these approaches from experience on an R/3 4.7 system, though it applies to mySAP ERP Central Component (ECC) as well. Much of the documentation on this subject is incomplete. For all three types of invoicing methods, you need to assign multiple bank accounts in the vendor master to the partner bank type, which I’ll explain in the next section.


Assign Multiple Bank Accounts in the Vendor Master


Your SAP system provides the functionality to store and use information from multiple vendor bank accounts in the Payment transactions screen of the vendor master general data via transaction FK03 (Figure 1). Figure 1 reflects the bank type determination logic I used in the vendor master, using the three-digit International Organization for Standardization (ISO) currency code as the Bank type.


Figure 1 Bank details vendor master


You can use the BnkT (bank type) field in the vendor master to enter text differentiators for identifying the vendor’s bank accounts. If you leave the bank type field blank against a bank account in the vendor master, then it serves as the default bank if the bank type information is missing in the vendor invoice. You may want to leave this field blank if the vendor has only one bank account and you want the system to select that bank account for all payments.


If the bank type is blank for multiple bank accounts, then the system looks for the first bank account with the blank bank type in the vendor master to use as the default. You are not required to define the text values — in my example, INR, SGD, and USD — elsewhere in your SAP system. The field allows any value up to a length of four characters. I’ll demonstrate the use of bank type with vendor invoice later on.


The system performs a check at the time of invoice creation on the bank type value used in the vendor invoice against the bank type values used in the vendor master. If you have not defined the bank type value in the vendor master prior to using it in the vendor invoice, the system shows an error message. The system performs the check to ensure that you are using a bank type value in the vendor invoice against which it can find a bank account in the vendor master. Otherwise, the system cannot determine a bank account for making payments to the vendor.


*** Prerequisites for Vendor Bank Selection ***


You need to take care of a few configuration prerequisites before you can use vendor bank selection in the automated payment functionality.


1. Check the Bank details check box in the payment method as defined at the country level in transaction FBZP. This ensures the selection of the bank details from the vendor master at the time of the automatic payment run. If you don’t do this, the system does not copy the bank details into the payment IDoc that it creates as a result of the automated payment run (transaction F110).


2. Make the Bank Business Partners field optional in the field status group attached to the vendor’s reconciliation G/L account by selecting the button under Opt. Entry for this field. This field maps to the Part.bank type (partner bank type) field in the vendor invoice. If the Bank Business Partners field is not optional and is in a suppressed state, then you cannot input the partner bank type field in the vendor invoice - OBC4

Note:
Bank type is known as partner bank type in the vendor invoice and maps to the field BSEG-BVTYP. You can maintain the field status group through SPRO>Financial Accounting>Accounts Receivable and Accounts Payable>Business Transactions>Incoming Invoices/Credit Memos>Carry out and check document settings>Maintain Field Status Variants. You can create a vendor invoice in the system in multiple ways. I’ll address the three methods of vendor invoice creation and the ways to use the partner bank type functionality in the following sections so you can make the payment to the vendor’s selected bank.


Method 1: Without Reference to a PO


You can create a vendor invoice manually without reference to a PO using transaction FB60. Once you enter transaction FB60, you need to fill in the details related to the invoice in the Basic data tab, including the vendor number, invoice date, posting date, and reference and amount details.

You can see the Payment tab in Figure 2, which shows fields for payment terms (Pmnt terms), payment method (Pmt Method) and partner bank type (Part. bank). Fill the Part. bank field with the appropriate value. As you see, you will pay from House bank field, and vendor receives money to the bank entered in Part. Bank type. You already maintained the bank type in the vendor master data (Figure 1). Provide the offsetting G/L account information in the bottom pane in the FB60 screen to create the invoice. Save to post the document.

Figure 2 Create a vendor invoice using transaction FB60

The invoice posted through FB60 makes a credit (CR) entry against the vendor and a debit (DR) entry against the offsetting expense G/L account. Figure 3 shows the vendor line item containing the bank type information. At the time of the payment run, the system uses bank account 22222 because I used bank type INR in this invoice (Figure 1).

Figure 3 Example accounting document created using transaction FB60


Method 2: With Reference to a PO

You can also create the vendor invoice manually with reference to a PO by using transaction MIRO. I have created a new invoice with reference to a PO for services provided by the vendor, as opposed to the pure accounting document in the first example.

You generally procure goods and services by raising a PO against a vendor, so you create the invoice with reference to the PO. (If you are procuring very low value items on an ad hoc basis without a PO, then you may have to create the vendor invoice using FB60, as discussed earlier.) MIRO creates an invoice document, which you can see using transaction MIR4 (Figure 4), and an accounting document, which you can see using transaction FB03 (Figure 5). You can fill in the appropriate value in the Part. bank field in the Payment tab in transaction MIRO, as in Figure 4. I used a blank value in the bank type field. I already maintained it in the vendor master data before I created the vendor invoice document.

Figure 4 Create a vendor invoice using MIRO


Figure 5 Example accounting document created using transaction MIRO

After entering transaction MIRO, enter the company code in which you are going to post the invoice using menu path Edit>Switch Company Code, or by pressing F7. Provide the invoice date, posting date, and reference in the Basic data tab. In the PO reference tab on the bottom pane of the screen, provide the purchase order details (Figure 4). Provide the partner bank type details in the Payment tab. Click on the save icon to post the documents. I left the Part. bank (partner bank type) field blank in this example to demonstrate the use of the default bank account later on. I’m using default bank account 33333 from Figure 1 here. The accounting document contains the payment information in the Part. bank field.

You can use mass maintenance of the partner bank type field if the vendor provided multiple bank accounts only at a point after go-live and you need to pay the invoices you created before to these multiple bank accounts. See the sidebar, “Mass Maintenance of Partner Bank Type in Vendor Invoices,” for a detailed description of this.


Method 3: Automatic Creation from 810 EDI Message

So far I have discussed two methods to create a vendor invoice manually in the SAP system. While these methods are useful, organizations that have matured in their SAP use prefer to automate tasks such as the posting of vendor invoices, thereby reducing manual intervention and effort. Vendors also benefit from automation because they receive money directly into their bank accounts and don’t have to spend resources on collecting and depositing payments to their bank accounts.

You can automate vendor invoicing by using EDI. The vendor sends the 810 EDI message to the SAP system. The system provides the INVOIC01 standard IDoc that you can use to map to the 810 EDI signal to post the vendor invoice (Figure 6). Now I’ll take you through an example to demonstrate the use of the partner bank type with the automated selection rule of the vendor’s bank account.


Figure 6 Illustrative vendor invoice IDoc in SAP

You can process the vendor invoice IDoc through the standard function module IDOC_INPUT_INVOIC_MRM. You first specify the function module in the partner profile of the vendor via transaction WE20. The INVOIC01 IDoc doesn’t contain any segment that can carry the partner bank type information. However, the function module provides access to user exits through which you can code the customized rules for vendor bank selection to populate the appropriate partner bank type in the invoice.

Use the customer function 014 (user exit ZXM08U25) to populate the partner bank type in the invoice (Figures 7 and 8). You can populate the partner bank type field using the change table field E_RBKPV-BVTYP.


Figure 7 Custom table to store rule-based value of partner bank type


Figure 8 User exit ZXM08U25


Step 1. Check for conditions in which you want to populate the partner bank type. My example makes the bank account selection based on company code currency, so a simple check here is to ensure that the vendor master exists in multiple company codes. If the vendor master doesn’t exist in multiple company codes, then you don’t need to use the bank type field.

Step 2. If the check in Step 1 is met, lay down the rules that determine the partner bank type.


Figure 7 shows the custom table that contains records illustrating the rules used in this article for determination of the vendor bank. I used the records maintained in the custom table to identify the partner bank type to use in the vendor invoice in step 3.


Step 3. Amend field E_RBKPV-BVTYP in the user exit (Figure 8) and write the partner bank type value to it. In Figure 9, you can see the ABAP code that I used to amend E_RBKPV_BVTYP in the user exit to write the partner bank type value. The system derived the partner bank type value using the user exit to create an accounting document (Figure 10).


Figure 9 User exit code logic


Figure 10 Example invoice created using user exit ZXM08U25


After you create the invoices with the three methods discussed above, you then need to perform an automatic payment run to select and make payment against the open vendor items. This applies to all three invoice methods.

Automatic Payment Run I will now complete the process by using transaction F110 to conduct the automatic payment run so I can show you the results and the selection of the vendor’s bank account for the four invoices that I have created.

Create a payment run manually using transaction F110. Fill the Parameter tab using the vendor number and company code to restrict the selection of vendor invoices to those created in Figures 3, 5, and 10 in the main article and Figure 1 in the sidebar. Execute the proposal run to create a proposal for the payment against selected vendor invoices. The proposal list in Figure 11 displays an invoice and the associated vendor bank account details. You can now use the partner bank type field to cross-check the invoices created in this article and the bank accounts selected in Figure 11 per the original requirement in Figure 1.


Figure 11 Vendor bank selection during proposal run


Once you confirm the proposal run for accuracy of document selection and data, run the payment run by clicking on the Payments button on the Status screen of transaction F110. This creates the payment documents in the SAP system. Then go to the Printout/Data Medium tab via transaction F110. Use program RFFOEDI1 under the bottom pane Lists along with an appropriate variant, which you can create using transaction SE38. Create the variant with the combination of company code, house bank, account, and payment methods. This ensures that you can select all the invoice documents in the proposal list for processing so you can create the payment IDocs. Go to the Status tab to create the payment IDoc automatically through menu path Edit>Payments>Schedule Print. Figure 12 illustrates a sample payment IDoc I created. The sample IDoc contains the chosen bank account details of the vendor.


Figure 12 Example payment IDoc


Mass Maintenance of Partner Bank Type in Vendor Invoices


The functionality I discussed in methods 1 and 2 assumes that you’ve been using the partner bank type functionality from the time the vendor went live in your SAP system. However, a practical situation may demand that a vendor provide single bank account details at the time of go-live, and later on provide the details of the other bank accounts. A robust solution thus should address the issue related to mapping of all open documents (vendor invoices pending payment) to the respective partner bank types. If you don’t map the open documents, then the system picks up the default vendor bank account (the one with the blank bank type in the vendor master) when you use transaction code F110 to create the payment IDoc. If you have not maintained a default bank in the vendor master, then it does not pick up a bank at all. In either case, you may end up making a payment to the wrong bank account. In such a case, you need to perform mass maintenance on the Part. bank field to populate the 
correct bank type value in all open invoice documents. I’ve created an example of a vendor invoice created with a blank partner bank type to demonstrate how you can perform mass maintenance on the Part.bank type (partner bank type) field even after you have posted the vendor invoice (Figure 1). I created the invoice using transaction MIRO. Note that in Figure 1 I left the Part.bank type field blank intentionally to demonstrate the mass maintenance functionality. This case is similar to the one shown in Figure 7 in the main article in terms of the invoice creation. However, I changed the bank type value in this case from blank to SGD using mass maintenance, so I can use bank account 44444 for payment (Figure 1 in the main article).


Figure 1 Vendor invoice with blank partner bank type


To perform mass maintenance, use transaction FBL2N. Enter the selection parameters to select those documents for which you need to maintain the partner bank type field. Follow menu path Environment>Mass Change>New Value, which produces a pop-up window. Enter the new value of the partner bank type SGD in the Part.bank type field and click on the Execute changes button. Select the invoice document (Figure 1) using the selection parameters upon entering transaction FBL2N. Then provide the value for the partner bank type field that you found in the New Values pop-up window. The partner bank type field acquires the new value in the vendor invoice document (Figure 2).


Figure 2 Vendor invoice post-mass maintenance of partner bank type

Sunday, March 2, 2014

baked beefy cheese macaroni

Bahan-Bahan:

  1. 2 cawan makaroni (direbus hingga lembut dan tos)
  2. 1 peket kecik daging kisar (kjee guna jenama Ramli 400 gms)
  3. 1 cawan tomato puree ( atau 1 tin kecik)
  4. 4 biji tomato masak ranum (dicelur dalam air panas dan buang kulit)
  5. 1 biji lada benggala (capsicum)
  6. 1 sudu besar serbuk oregano
  7. 1 sudu besar lada hitam kisar
  8. 1 labu bawang besar
  9. 4 ulas bawang putih
  10. 2 kiub perisa daging/ayam
  11. ceddar atau parmesan cheese (disagat)


Cara-Cara:

daging cincang dicuci dan ditos hingga kering. rebus makaroni hingga lembut dan toskan. bawang besar dan lada benggala di dadu. bawang putih dicincang halus. blend tomato masak ranum yang telah dicelur dan dibuang kulit bersama tomato puree. cara ini tak payalah tambah air.

bubuh sedikit minyak dalam periuk. kjee guna minyak zaiton. korang gunalah minyak joyah ke bedah ker. hehehe. minyak apapun boleh. panaskan dan tumis bawang putih seketika dan bawang besar hingga wangi. kemudian masukkan daging dan masak sehingga air daging menjadi kering. masukkan serbuk oregano. kacau2. kemudian masukkan tomato yang telah diblend bersama tomato puree. kacau hinga rata dan masukkan lada hitam serta dua kiub daging yang telah dipecah2kan. kacau hingga pekat. kemudian taburkan lada bengala. kalau suka, bubuhlah sikit lagi garam. apabila sudah agak kering, padamkan api dan masukkan makaroni yang telah direbus tadi. gaul rata.

sediakan bekas untuk membakar. bubuh sedikit minyak dalam bekas tadi dan sapu keliling bekas. pastu bubuhlah campuran makaroni dan daging ke dalam bekas. ratakan elok2 dan taburlah cheese sebanyak mana yang suka.
bakar dalam oven 180 darjah selama 15 hingga 20 minit.

Bihun Sup (9 - 11 Bulan)

Bahan-Bahan (Hidangan untuk 2 orang)

  • 15 g bihun, direndam dalam air sejuk selama 10 minit
  • 15 g (1 sudu makan) ubi keledek, dikupas dan dipotong dadu
  • 10 g (1 sudu makan) lobak merah dipotong dadu
  • 15 g (1 sudu makan) bunga kobis, dipotong dadu
  • 60 g (¼ cawan) isi ikan (tenggiri/kurau/ikan merah)
  • 400 ml (1¾ cawan) air


Cara memasak

  • Didihkan air di dalam periuk.
  • Masukkan ubi keledek dan lobak merah dan masak sehingga lembut.
  • Masukkan bunga kobis dan diikuti dengan ikan. Masak sehingga lembut.
  • Masukkan bihun, teruskan memasak sehingga bihun menjadi lembut.
  • Lenyek sehingga lembik dengan menambah air yang secukupnya.

Campuran Jagung Manis, Ubi Kentang dan Ayam (9-12 bulan)

Bahan-Bahan (2 org)

60 g (¼ cawan) dada ayam, dimasak, dibuang tulang dan kulit.
90 g (1 biji) ubi kentang, dikupas dan dipotong dadu
20 g (2 sudu makan) lobak merah, dipotong dadu
30 g (2 sudu makan) jagung manis
125 ml (½ cawan) stok ayam
30 ml (2 sudu makan) susu ibu
10 g (1 sudu makan) bawang besar, dicincang


Cara memasak

Rebus bawang besar dengan stok ayam di dalam periuk.
Masukkan ubi kentang. Tutup dan renehkan selama 15 minit sahingga ubi kentang menjadi lembut.
Masukkan jagung dan masak lagi selama 2-3 minit.
Akhirnya masukkan ayam dan rebus sehingga masak.
Kisar campuran sehingga menjadi kasar.
Masukkan susu ibu dan hidang.


Cadangan
Anda boleh melenyek dengan belakang sudu semasa memberi anak anda makan.
Hidang bersama nasi lembik.